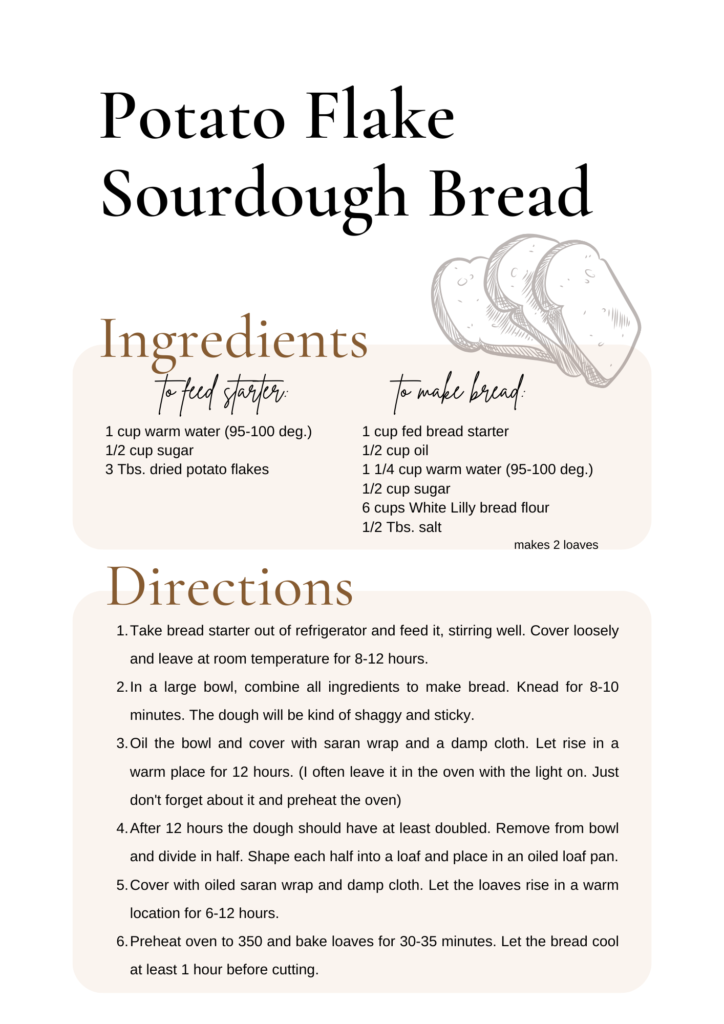
This potato flake sourdough bread recipe is the best bread recipe you can find! It has such a sweet and original flavor that you can only find with potato flake sourdough starter. It only contains 6 ingredients, and you’ll be able to pronounce all of them! If you are not familiar with potato flake sourdough starter, check out my blog post on how to make potato flake sourdough starter.
(This post may contain affiliate links and as an Amazon Associate, I may earn a commission on the purchase of certain products at no cost to you)
What is Potato Flake Sourdough?
Potato Flake Sourdough is a sourdough starter that is fed with potato flakes and sugar. It is like traditional sourdough starter in that is uses natural yeast and bacteria to make the bread rise. If you are completely new to sourdough and want to learn how to start baking with potato flake sourdough starter, check out my blog post on how to start a potato flake sourdough starter!
I was first introduced to this type of sourdough bread by my grandmother’s neighbor when I was just a kid. It has always been my favorite type of bread, and now I love getting to share it with others as well! It makes the perfect slice of bread for a ham sandwich and certainly makes the holidays more special.
Tips for Baking With Potato Flake Sourdough
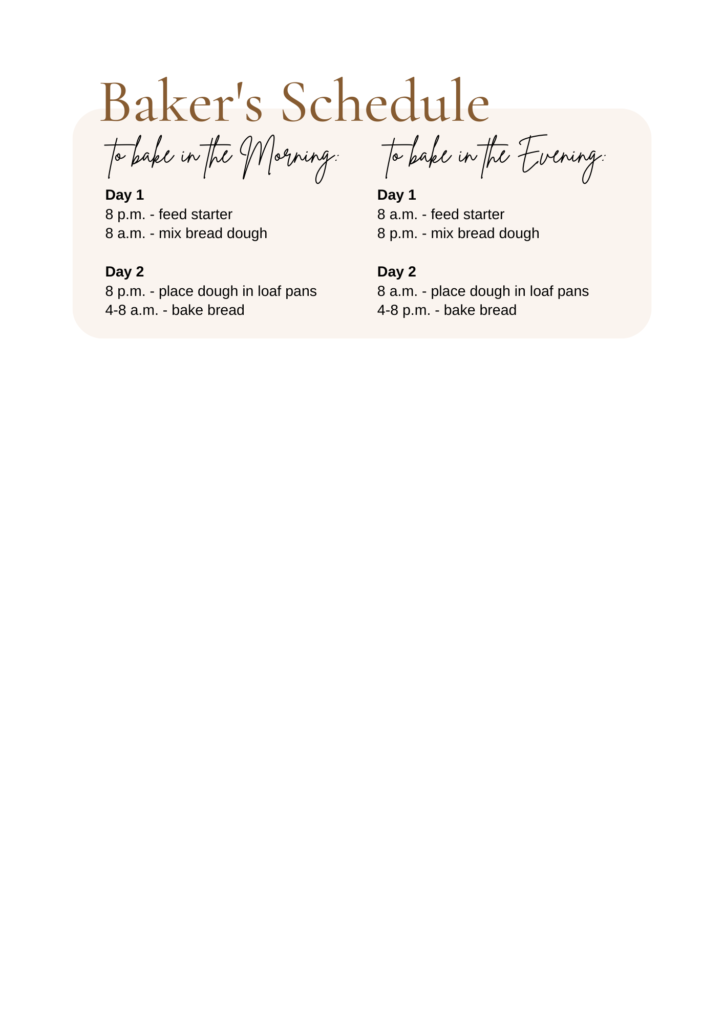
- Plan a head and make a schedule. This bread recipe takes some planning, and it is best to have a clearly defines baker’s timeline. I have attached an example timeline at the bottom of this post. It takes a day to feed the starter, and a day to bake the bread. This can seem overwhelming at first, so a schedule makes it so much easier.
- Feed every 3-5 days. It is best to feed your bread every 3-5 days in order to maintain your starter. This works out to baking bread once a week which is a perfect way to keep your family stocked with healthier bread options.
- Store your starter in the refrigerator when you are not using it.
- Store baked bread in an airtight container on the counter and it will stay fresh for about 1 week. Bread can also be frozen for up to 3 months.
Ingredients for Potato Flake Sourdough Bread
- Potato Flake Sourdough Starter (Fed within 12 hours) – This bread starter is not like traditional sourdough starter which is fed with water and flour. Potato Flake starter is fed with water, sugar, and potato flakes. Here’s my blog post on how to start potato flake starter!
- Warm Water – Warm water helps activate the yeast in the starter. If the water is too hot, though, it can kill the yeast, so it needs to be within 95-100 degrees F.
- Sugar – Yeast feeds off of the sugar, and it also gives the bread a much sweeter taste than traditional sourdough bread.
- Oil – I have used canola oil, vegetable oil, and melted and cooled butter for this part. All of these types of oil work great, but canola and vegetable oils have a more neutral taste than butter. In my opinion, butter gives the bread a slightly more sour flavor.
- Unbleached Bread Flour – I have always used White Lily Unbleached Bread Flour, so that is the only flour I recommend using.
- Salt – The amount of salt I recommend sounds like a lot, but it is essential to balance the sweetness of the bread.
How to Make Potato Flake Sourdough Bread
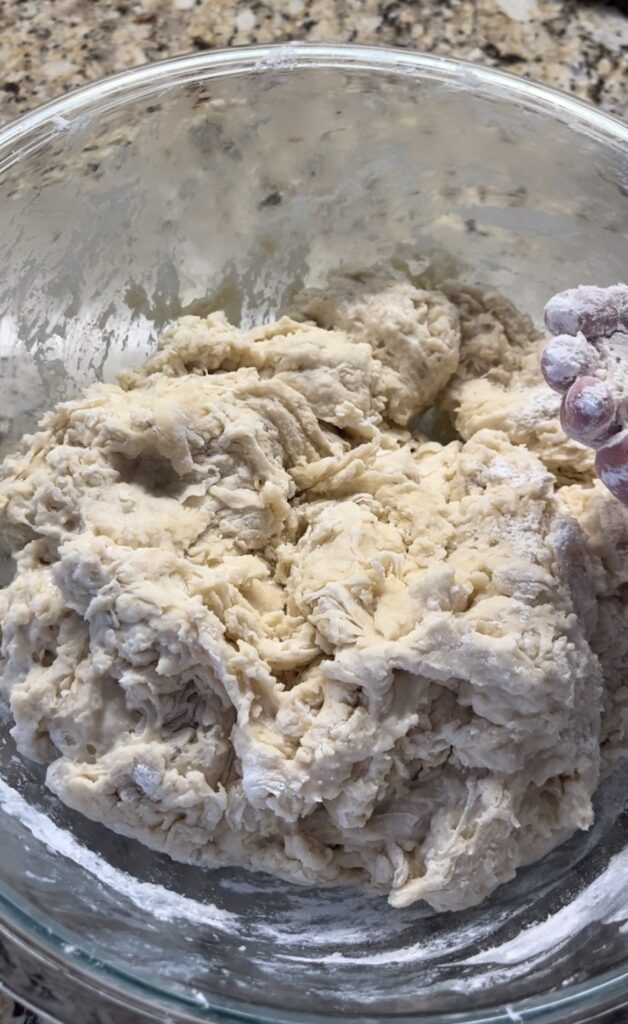
Step 1: First, mix all the ingredients together in a large glass bowl. The dough will be a little bit shaggy and sticky like in the image below. This picture was taken right when the ingredients began to come together, before kneading. Knead the bread for 8-10 minutes in order to form the dough. You may want to turn the dough out onto a silicon mat for kneading, but oftentimes I am in a hurry and just knead the dough in the bowl. If the dough gets too sticky and gooey, just add a little more flour to your hands.
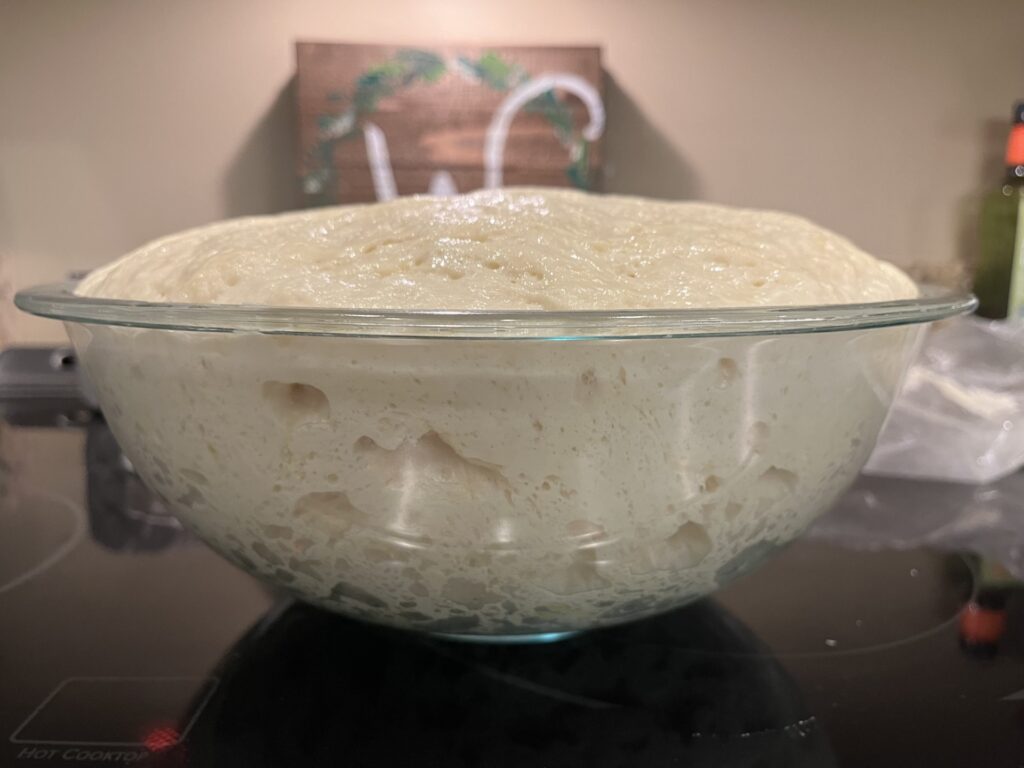
Step 2: Oil the bowl and cover the dough with oiled plastic wrap and a damp cloth. Place in a warm place for about 12 hours. I usually place it in my oven with the light on in order to maintain a warm temp and keep it off my limited counter space. Just don’t forget about it and preheat your oven!! (I like to time this step to happen overnight in order to avoid that mistake!) The second image below shows the dough after it has risen for 12 hours.
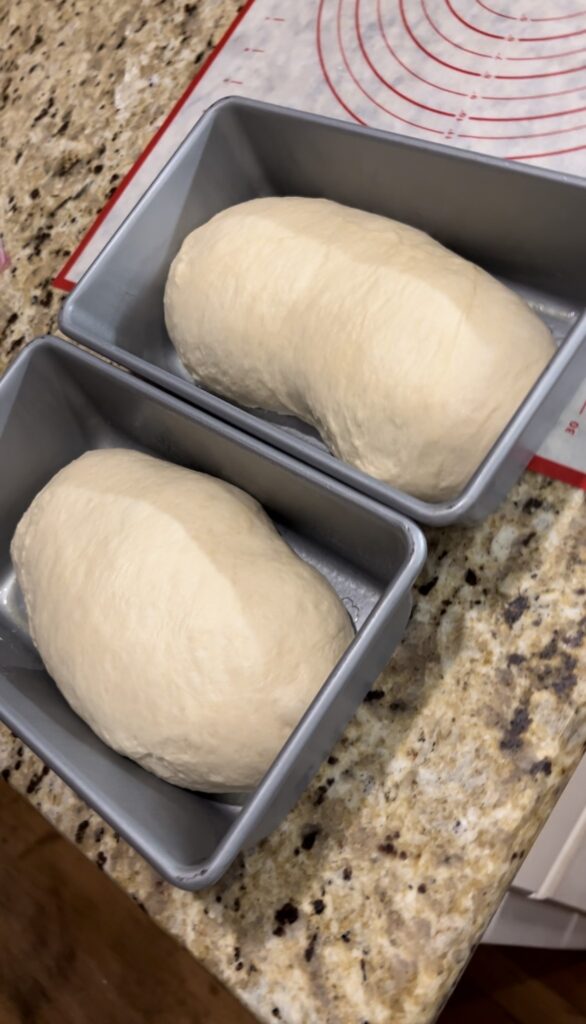
Step 3: Turn the dough out on to a silicon mat and divide it in half. Shape each half into a loaf and place them in oiled loaf pans.
Step 4: Cover the loaf pans with oiled plastic wrap and a damp cloth. Place in a warm location for 6-8 hours. This step can have a lot of variation. Just keep an eye on the loaves and make sure they don’t bubble up out of the pans. You’ll know they are ready to bake when they have doubled in size and pretty much fill the loaf pans all the way to the top.
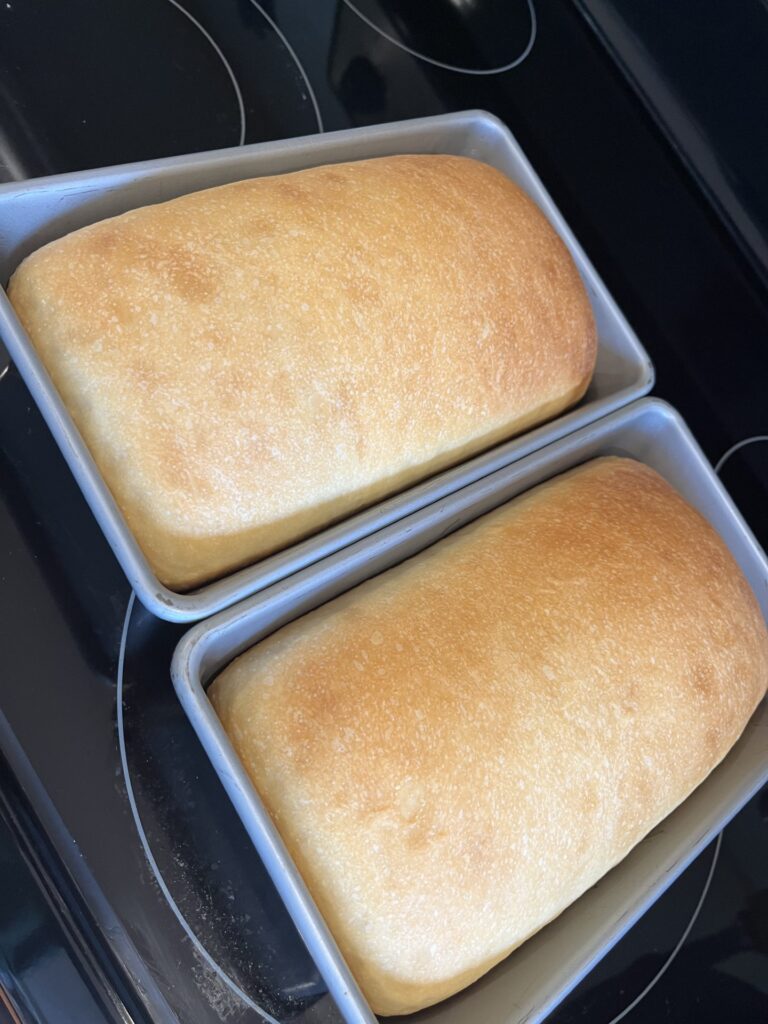
Step 5: Bake the Bread. Make sure risen dough is out of the oven and preheat the oven to 350 degrees. Bake for about 30-35 minutes or until they are golden brown on top! Let cool for at least 15 minutes before taking out of the pans and 1 hours before slicing.
Potato Flake Sourdough Bread Recipe
Potato Flake Sourdough Bread
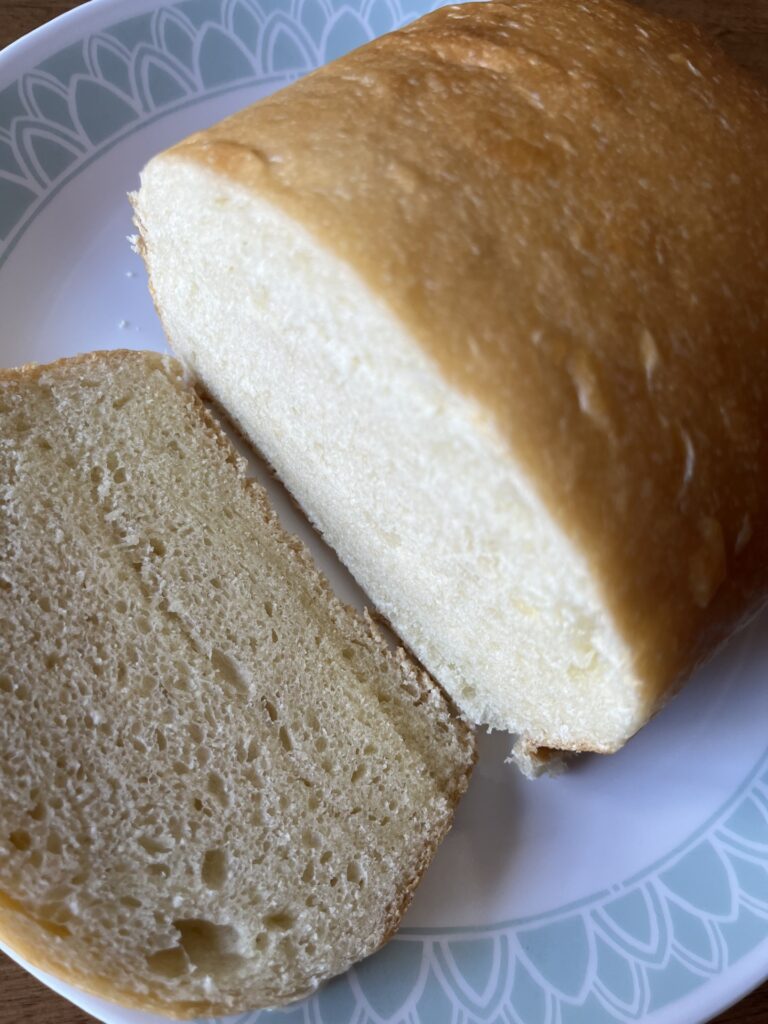
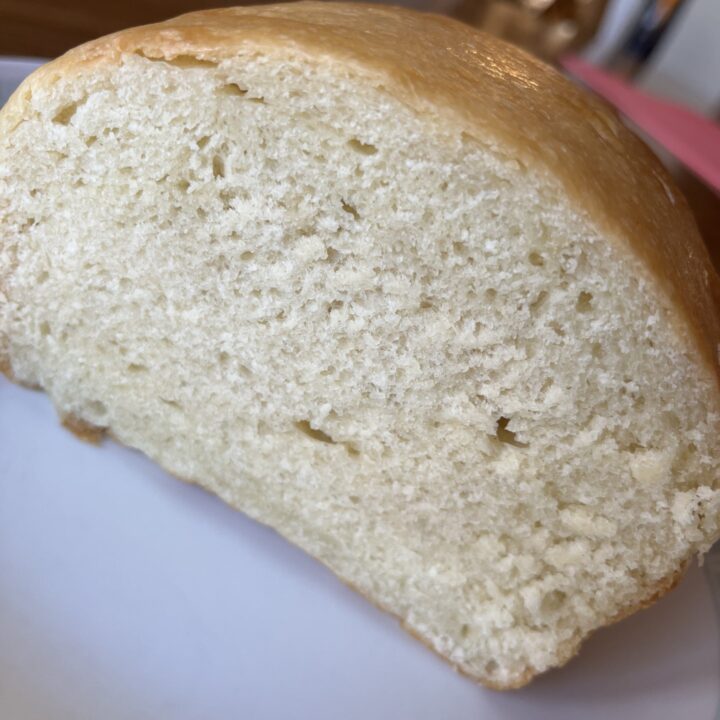
Potato Flake Sourdough Bread is a sweet, fluffy bread that is so delicous. It has a much sweeter flavor than traditional sourdough bread because the starter is fed with potato flakes and sugar rather than water and flour. It is the perfect loaf of bread to eat alone or as a sandwich!
Ingredients
- 1 cup of fed potato flake sourdough starter
- 1-1/4 cups warm water (95-100 deg. F)
- 1/2 cup sugar
- 1/2 cup oil or melted and cooled butter
- 1/2 Tbs. salt
- 6 cups unbleached bread flour
Instructions
1. In a large glass bowl mix the starter, water, sugar, and oil together. Slowly pour in the flour and salt. Continue to mix with a wooden spoon or silicone spatula until a shaggy dough is formed.
2. Once a shaggy dough is formed, knead the bread mixture with your hands for 5-10 minutes. Kneading is an essential step in bread making because it helps gluten formation.
3. Oil the large glass bowl and place the dough in the bowl. Cover the bowl with oiled plastiv wrap and a damp cloth. The oiled plastic wrap is placed between the dough and the cloth so that the dough does not stick to the cloth during the rising process.
4. Place in a warm location for 8-12 hours. I usually place my dough in the oven with the light on.
5. After 8-12 hours once the dough has doubled in size, punch it down and pour the dough out onto a lightly floured surface.
6. Divide the dough in half and shape into two loaves. Place each loaf into an oiled bread pan. Cover again with oiled plastic wrap and a damp cloth.
7. Place in a warm location to rise for 4-8 hours.
8. Once the dough has doubles in size, heat the oven to 350 deg. F.
9. Cook the loafs for 30-35 minutes. Let rest in pans for at least 15 minutes before removing and let cool for at least 1 hour before cutting.
Notes
During the final proofing stage when the dough is rising in the load pans, you may have to keep an eye on the dough to make sure it does not over proof. You want the dough to puff up to about double its original size and nearly fill the load pans. If it rises to much that it overflows out of the loaf pans, it is likely overproved and will not rise any more when baked. It is not ruined if this happens, it is just not the best version of the bread. I usually only have this happen when I forget about it and let it rise 8-12 hours.
It is a really good idea write out a baker's timeline when working with sourdough that way you can keep up with what steps need to be done at what time!
When I say a fed sourdough starter, I mean one that has been fed with 1 cup warm water, 1/2 cup of sugar, and 3 Tbs potato flakes within the last 8-12 hours and has been left out on the counter to ferment!
Recommended Products
- Large Plastic Container
- Glass Measuring Containers
- Wooden Spoon
- Loaf Pans
- Silicon Mat
- Wood Handle Dough Divider
Recipe Card and Baker’s Timeline
